As I briefly mentioned in the post “Building a Media Center”, I use Kodi on various devices to access my media collection. Here, I’d like to go into more detail about the installation and configuration that make this possible.
Media Library
This configuration requires a device that, in addition to SMB/CIFS (Windows) shares, also offers the ability to host a MySQL/MariaDB database. In my case, this is a Network Attached Storage (NAS) device from Synology, but there are also network-attached hard drives available that can provide this functionality. First, you must create a database user who is authorized to create new databases (see below), and the database must be accessible on the LAN.
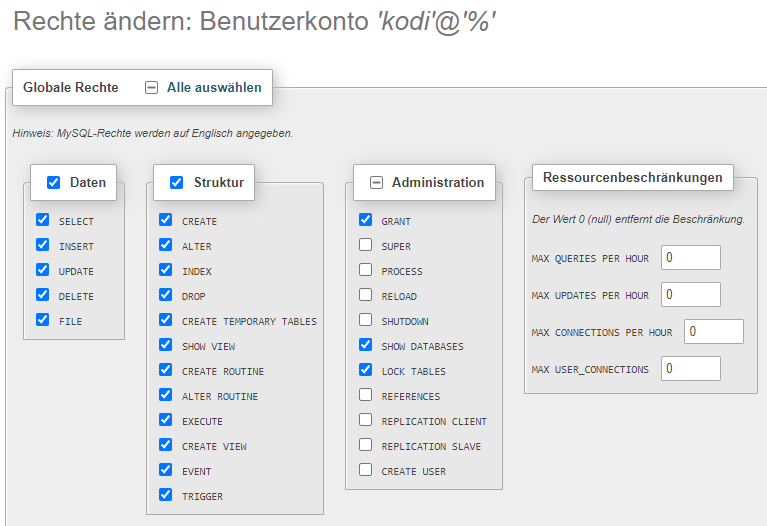
I’ve also created a separate share for each media type (Music Audio, Music Video, TV Shows, Movies), as well as an additional one for movie series (if there’s a second, third, etc., part, the structure can be reflected there). But that can be done later, once Kodi is installed on at least one device and you have an idea of what the server should offer.
Installation
Since a new version of Kodi isn’t always released on all platforms—sometimes because of a new feature—I’ve decided not to install Kodi on my Windows devices (laptop and PC) via the Microsoft Store. There, every new version would be distributed automatically, and I’d prefer to manage that myself, since my Windows devices are used to update my library and all devices should access a single database. Generally, though, you can find the software for all supported platforms on kodi.tv, where I simply download the Windows setup to install it on my PC and laptop. For my smart TV, which runs on Android TV, I simply installed Kodi from the Google Play Store.
For my not-so-smart TV, I’m using a Raspberry Pi 4 Model B (4GB RAM) housed in an Argone One V2 case, as described in the post “Building a Media Center.” For the operating system, I use a SanDisk Ultra Fit 32GB USB flash drive, since it’s much more durable when writing data compared to an SD card and, when plugged in, protrudes only slightly from the case. To load the boot medium, simply download and run the Raspberry Pi Imager on your PC.
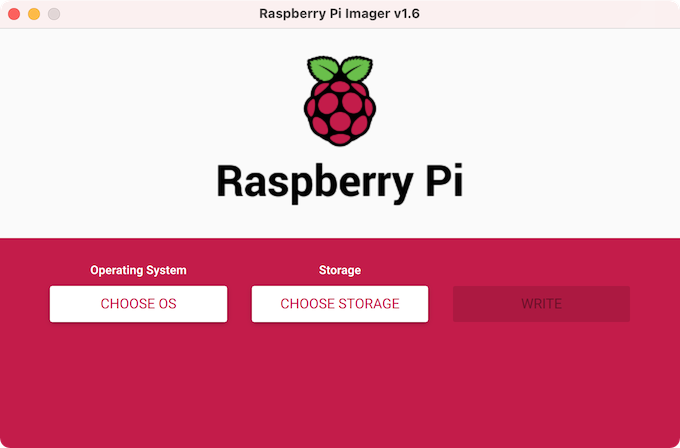
Select LibreELEC as the operating system and, under “Storage,” select the USB flash drive (or SD card) you inserted earlier. Be sure to check the size of the storage device, as all data on it will be erased. Click “Write” to write the image to the storage device. LibreELEC is a minimal Debian distribution that contains only Kodi and the libraries required for its operation. Once this is done, the Raspberry Pi can boot from this storage device.
Configuration
Each of the installations mentioned above is already ready to run, but would start up with a local database used to manage the media. We change this behavior by creating the advancedsettings.xml file in the user directory and populating it as explained below. I’ve had Android devices in the past where the permissions weren’t sufficient to create the file. In that case, this won’t work on that device—or it will only work if the device is rooted! But first, here are the default paths, depending on the operating system, where the file must be created.
| Operatingsystem | Path |
|---|---|
| Android | /Android/data/org.xbmc.kodi/files/.kodi/userdata/ |
| Android (SD Card) | /sdcard/Android/data/org.xbmc.kodi/files/.kodi/userdata/ |
| Fire TV | /storage/self/primary/Android/data/org.xbmc.kodi/files/.kodi/userdata/ |
| iOS | /private/var/mobile/Library/Preferences/Kodi/userdata/ |
| MacOS | /Users/ |
| Linux | ~/.kodi/userdata/ |
| Windows | %appdata%\Kodi\userdata\ |
| LibreELEC | /storage/.kodi/userdata/ |
The Kodi Wiki describes the available settings in detail, but here we only need the ones for the database. You'll need one database for music and one for video.
<advancedsettings>
   <musicdatabase>
        <type>mysql</type>
        <host>192.168.1.254</host>
        <port>3307</port>
        <user>kodi</user>
        <pass>4gHGDIlfrMJD8sfvgH_J</pass>
    </musicdatabase>
    <videodatabase>
        <type>mysql</type>
        <host>192.168.1.254</host>
        <port>3307</port>
        <user>kodi</user>
        <pass>4gHGDIlfrMJD8sfvgH_J</pass>
    </videodatabase>
</advancedsettings>
The user name is always “mysql” for both MariaDB and MySQL. For the host, you can enter a fully qualified hostname or an IP address (using the IP address skips the DNS lookup if the database server has a static IP address). The port is the one on which the database server listens for connections; 3307 is the default port for MySQL/MariaDB. The username and password are the ones created for the database users earlier in this article (do not use the password shown here—it’s publicly available online). I use a single user for both databases. Once the advancedsettings.xml file has been created, it can simply be copied to any new systems you want to connect.
Now, the shares set up earlier in this post need to be configured on all involved devices (this can be done in the Kodi GUI), and once a video or song has been added on one of the devices, it will automatically be available on all the others as well.