Install Linux Mint alongside Windows (Dual Boot)
It might seem complicated at first, but the actual installation of Linux Mint is actually simpler than that of Windows. In this case, however, we will not wipe the PC (or laptop) to run Linux Mint as the sole operating system; instead, we will set it up so that a boot menu appears when the computer starts, allowing us to choose between Windows and Linux Mint. While this approach is somewhat more challenging, it offers the rewarding benefit of being able to use both systems side-by-side over an extended period. If a specific function or application isn't quite ready for daily use in Mint, it can still be used in Windows. Even more importantly, this setup allows you to verify—while configuring applications—that everything is set up exactly as desired by checking back in Windows. A handy side effect is an additional boot menu entry that lets you boot directly into the (UEFI) BIOS. I will provide links in the text to all the additional tools required, or to their download locations.
Preparation on Windows
First, you need to create space on the computer for the additional operating system to use. While this can be done using built-in tools, the command line is not an option I would want to inflict on someone who simply wants to use the device without grappling with its inner workings. There must be sufficient free space available for Linux on the system drive (C:); I would plan for at least 60 GB, though more is always better. Windows also needs to retain free space on its system partition! To free up space, you can clean up your user profile (enter %USERPROFILE% into the File Explorer address bar and press Enter). In any case, it is a good idea to back up your profile before altering the partition layout!
Once enough space is available or has been freed up, install MiniTool Partition Wizard (Free Edition), which makes managing partitions much easier. After installation, be sure to restart your computer, even if the installer does not prompt you to do so. Since we will be working on the Windows system drive—something Windows normally tries to prevent—the system needs to be able to reboot without loading Windows itself.
Partitioning
Launch MiniTool Partition Wizard (you can close the promotional window by clicking the X). Its window is divided into four sections:
- a horizontal menu bar with icons at the top (highlighted in color), which we do not need
- a menu containing commands on the left side
- a list of all partitions in the upper section on the right, which we also do not need
- a graphical representation of the partitions in the lower section on the right—this is where we will start
Windows partitioning—including the number of partitions—can vary significantly depending on the installation method and the person who performed the setup. I will explain the process using the partitioning layout of my own notebook, which I reinstalled myself, resulting in a clear and straightforward partition structure. The graphic below shows the visual layout (captured after installing Linux Mint); the Windows system drive—identified by drive letter C: and formatted as NTFS—is highlighted with a blue border. My partition is labeled System, but yours might have a different name or no label at all. Immediately following it, there is usually another partition of the type Windows RE, which we will also need to move later in the process. If there are any additional partitions located before or after these, we will simply ignore them.

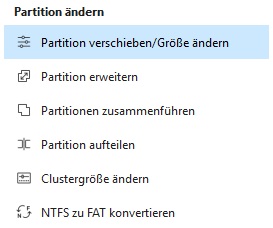
After the Windows system partition has been selected, the menu item Move/Resize Partition can be selected in the menu on the left.
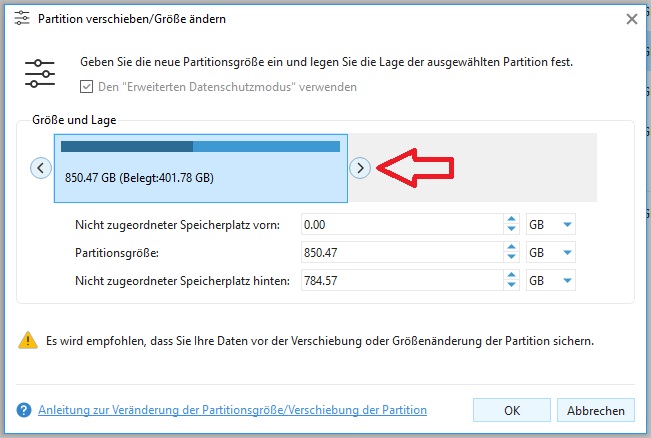
A dialog box opens showing a graphical representation of this partition. It features a handle on both the left and right sides—indicated by stylized arrows—and you can use the right-hand handle to shrink the partition. The bar within the display allows you to estimate how much free space will remain for Windows (the dark area represents used space, while the light area represents free space), though exact numerical values are also shown. Below the graphical display, you can also see how much space will be available for Linux Mint (labeled as "Unallocated space" at the end). Once you are satisfied with the partitioning, click the OK button to close the window. Don't worry: no changes are made to your hard drive (or SSD) at this stage.
If you have a Windows RE partition behind the Windows system partition, it will now be moved (otherwise you can skip this step) so that it continues to be directly attached to the system partition. Windows expects it this way, otherwise the Windows Recovery Environment (Windows RE) will no longer work. To do this, proceed as before with the system partition: Mark the Windows RE partition in the graphical display and then select Move/Resize Partition in the menu on the left to open the dialog window for editing the partition again.
Here you can now simply use the mouse to move the partition (grab it in the middle) all the way to the left and exit the window again using the Ok button. Don't worry: nothing will be changed on your hard drive (or SSD) at this moment.
") {.center}
The result should now look something like this. Double-check that the partitioning meets your requirements. If you are unsure, you can simply close MiniTool Partition Wizard without applying the changes and sleep on it.

To implement the planned partitioning changes, click the "Apply" button at the bottom left. The application will then begin its work and write the desired changes to the hard drive or SSD.

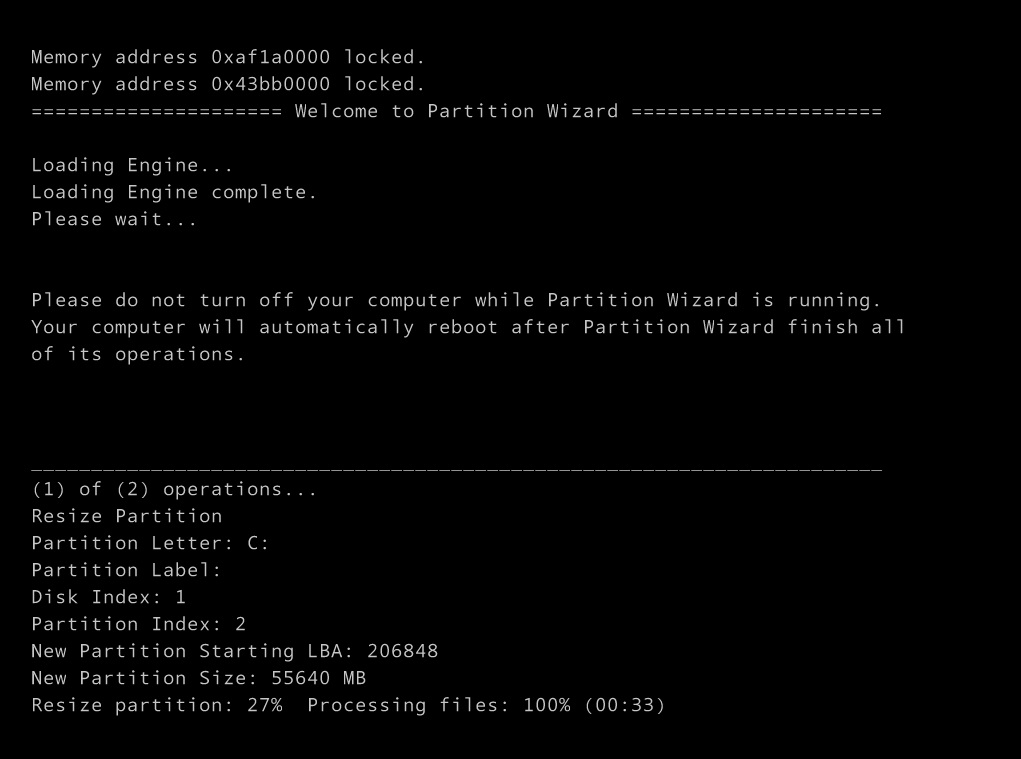
Since this involves the system drive of your Windows installation, this change cannot be made while Windows is running. Therefore, MiniTool Partition Wizard restarts the computer in a secure environment to apply the changes. Depending on the type and size of the hard drive, this process may take some time. This process must not be interrupted! Once the system partition has been resized and the RE partition moved, MiniTool Partition Wizard restarts the computer back into Windows. Apart from Windows having less available space, nothing else has changed so far, and the computer can continue to be used as usual—meaning the installation of Linux Mint does not necessarily have to take place immediately.
Preparing for installation
A USB flash drive with at least 8 GB of storage is required. To write the ISO image to the drive and make it bootable, we use Rufus; the portable version, which runs without installation, is sufficient. Now all we need is the image itself—but which flavor should it be?
Linux Mint or Linux Mint Debian Edition (LMDE)?
Actually, personal taste has nothing to do with the choice. Linux Mint was originally based on Ubuntu sources. Ubuntu, in turn, is built upon Debian sources but updates applications beyond just security patches and has contributed several useful tools not found in Debian. On the other hand, LMDE eliminates the intermediate step involving Ubuntu sources; Debian is conservative with updates, which benefits stability. However, Debian does not support Personal Package Archives (PPAs)—a feature in Ubuntu that allows you to install applications from external sources to access newer software that might include essential functionality. I cannot make this decision for you. Do some research yourself to see which features seem more valuable to you. I am providing download links for both; the subsequent steps are the same, and there is hardly any noticeable difference in daily use.
- Linux Mint Download, choose the Cinnamon Edition.
- Linux Mint Debian Edition (LMDE) Download
Installationsmedium (USB-Stick) vorbereiten
Launch Rufus:
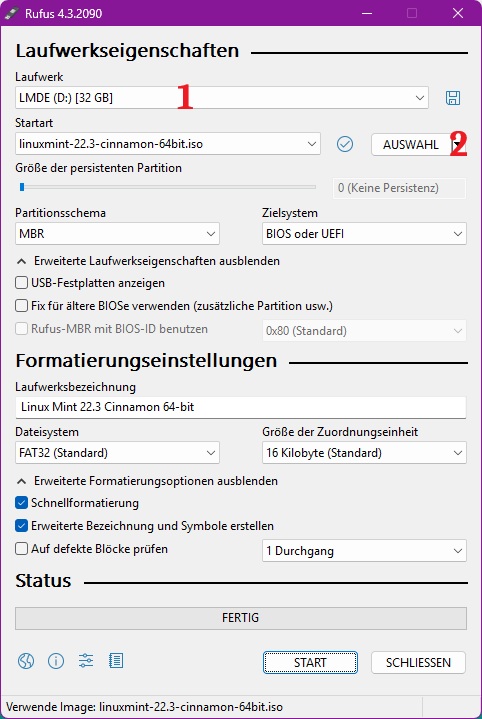
- Select the USB drive under Device (1).
- Use the Select button to open a file selection dialog and choose the ISO image (2); it will then appear under Boot selection.
- Click the Start button to have Rufus begin writing to the USB drive. All data on the drive will be erased!
Perform installation
Boot the computer from the inserted USB drive now. You can do this using the BIOS boot menu (e.g., F8 or F12 after turning on the power) or the Windows function Restart from EFI drive. There are too many possible settings to cover them all here, so I will limit myself to the Windows-native method.
Restart the computer
- The computer is turned on and Windows is running
- Insert the USB drive
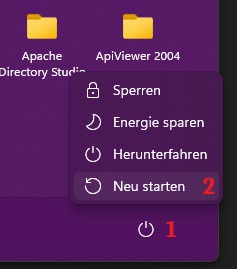
- Press the Windows key on the keyboard (or click the Start button on the taskbar)
- Click the Power button (1)
- Press and hold the Shift ⇧ key on the keyboard, then click Restart (2)
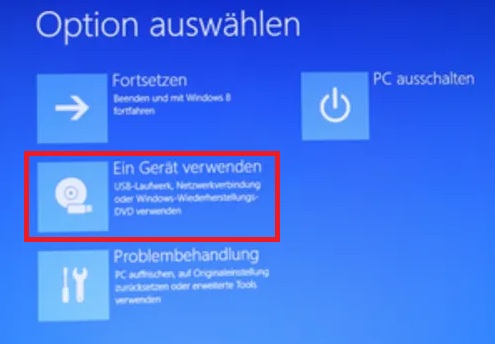
Windows will now initiate a restart and display Please wait on the screen. Afterward, you will see the following menu; select Use a device.
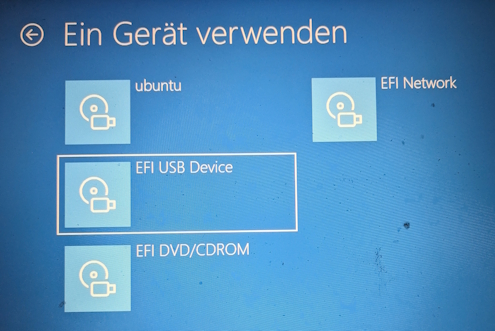
Then, in the menu that appears, select EFI USB Device.
Linux Mint starten und ausprobieren
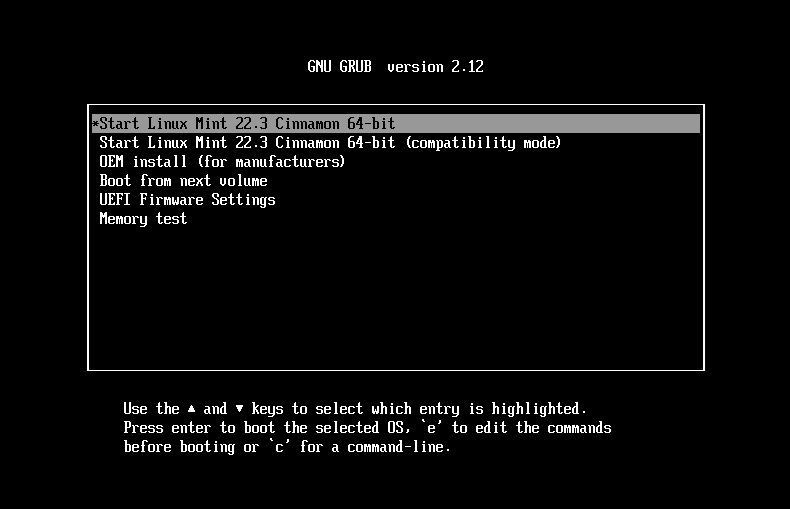
You will now see the Linux Mint boot menu. The appropriate menu item is pre-selected and will start automatically after a few seconds.
Once startup is complete, you will have a fully functional Linux Mint system running (a live system) that you can try out at your leisure. The essential tools and applications are included. A web browser (Firefox) and LibreOffice come pre-installed, and you can adjust the language and keyboard layout. Once you are satisfied, launch the actual installation using the Install Linux Mint icon on the desktop.
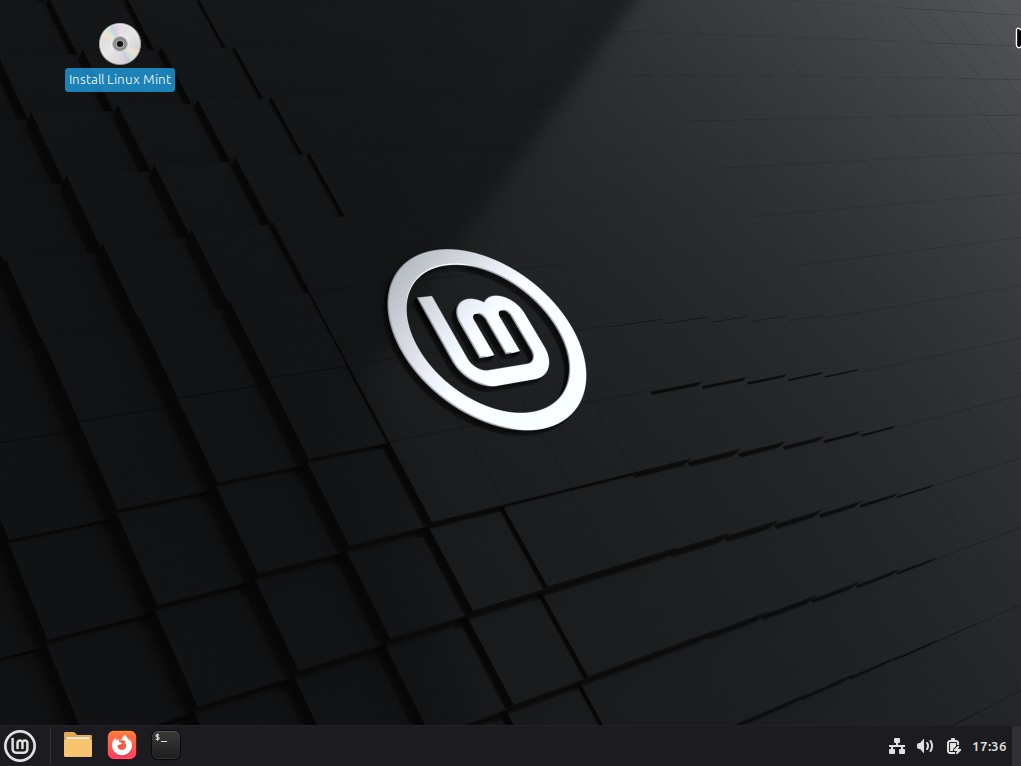
Install Linux Mint
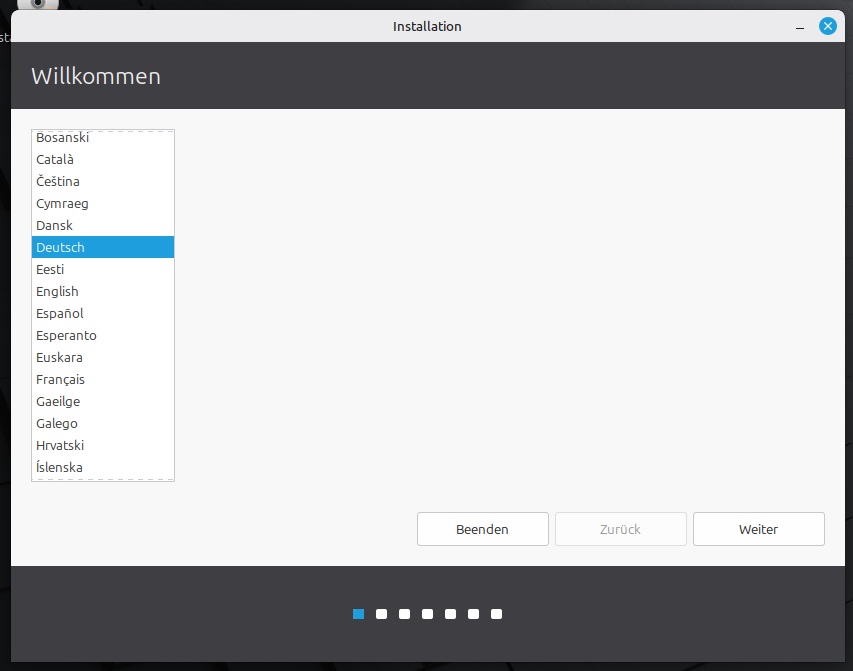
The installer first asks for the language and then immediately changes the installer's language as well.
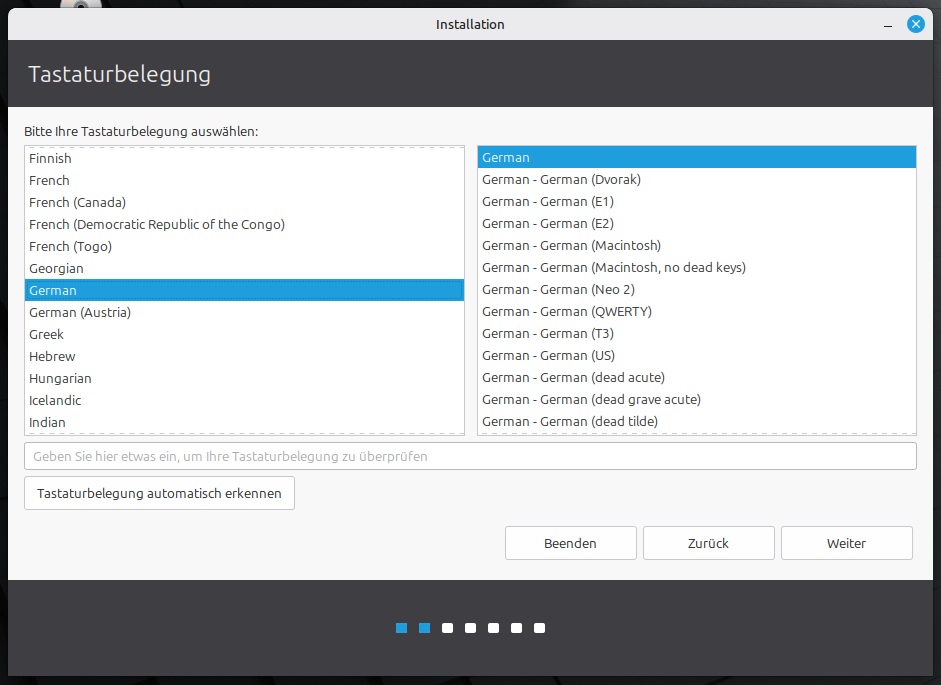
Next, select the keyboard layout; this setting will apply to the rest of the installation process.
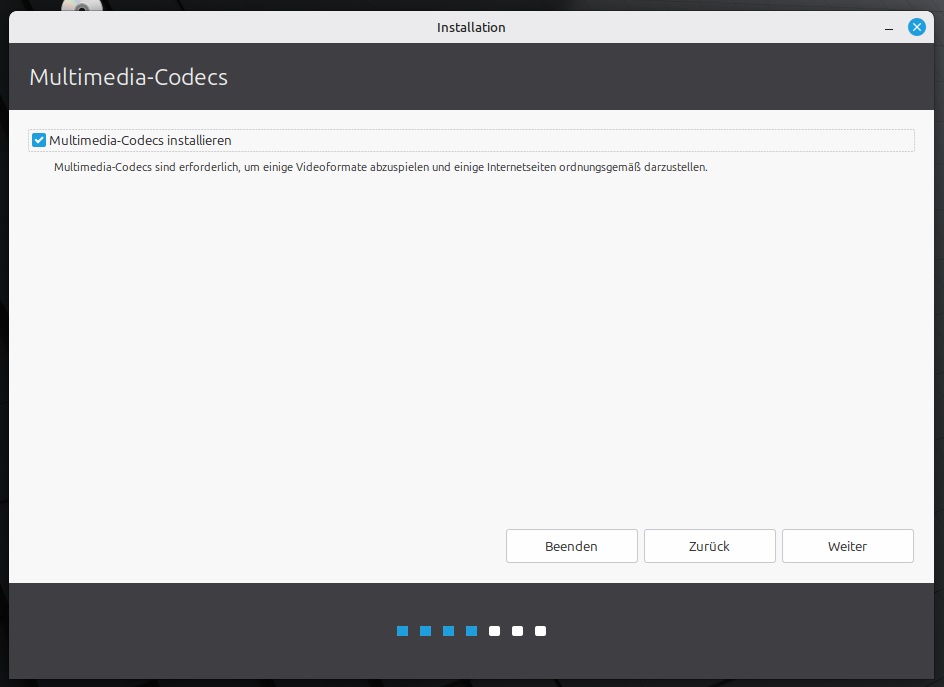
You should also choose to install multimedia codecs (check the box), as you won't be able to play videos or music without them.
You can simply accept the default hard drive/SSD partitioning if the existing Windows installation has been detected.
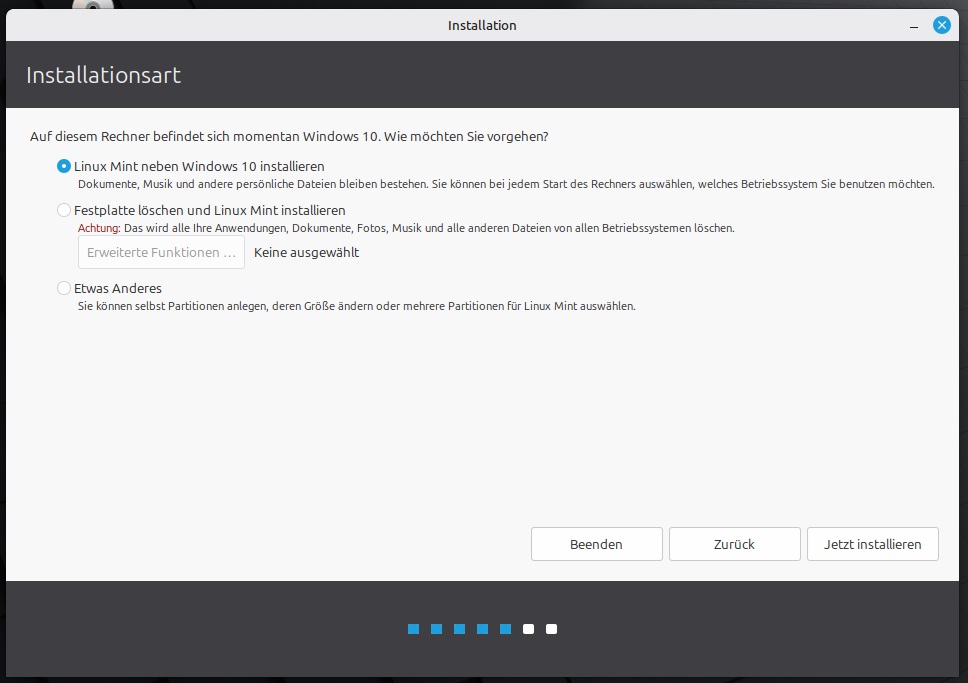
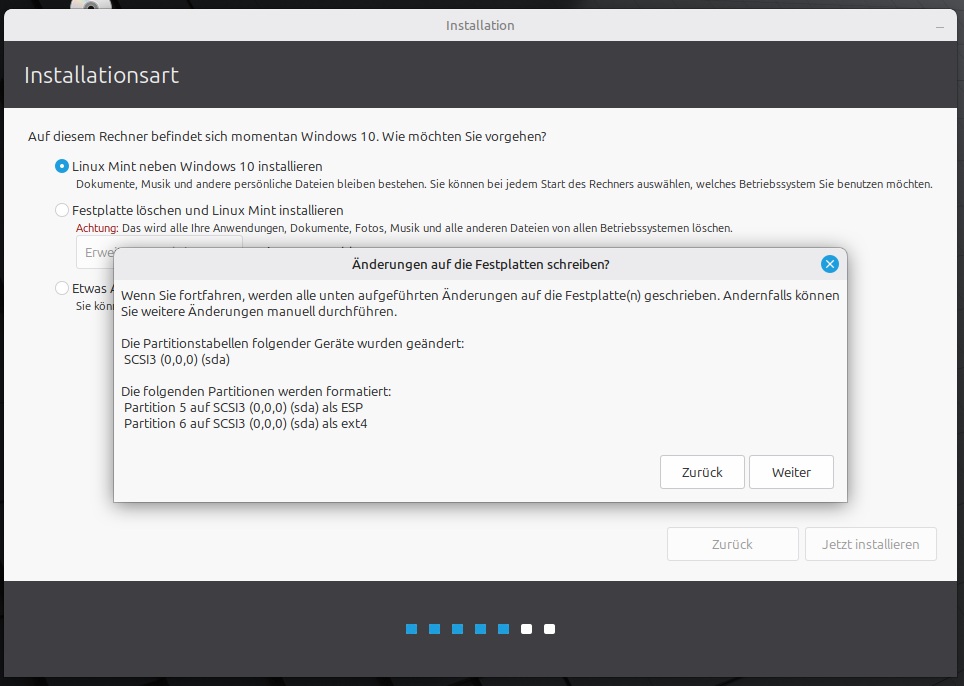
You also need to confirm the security prompt.
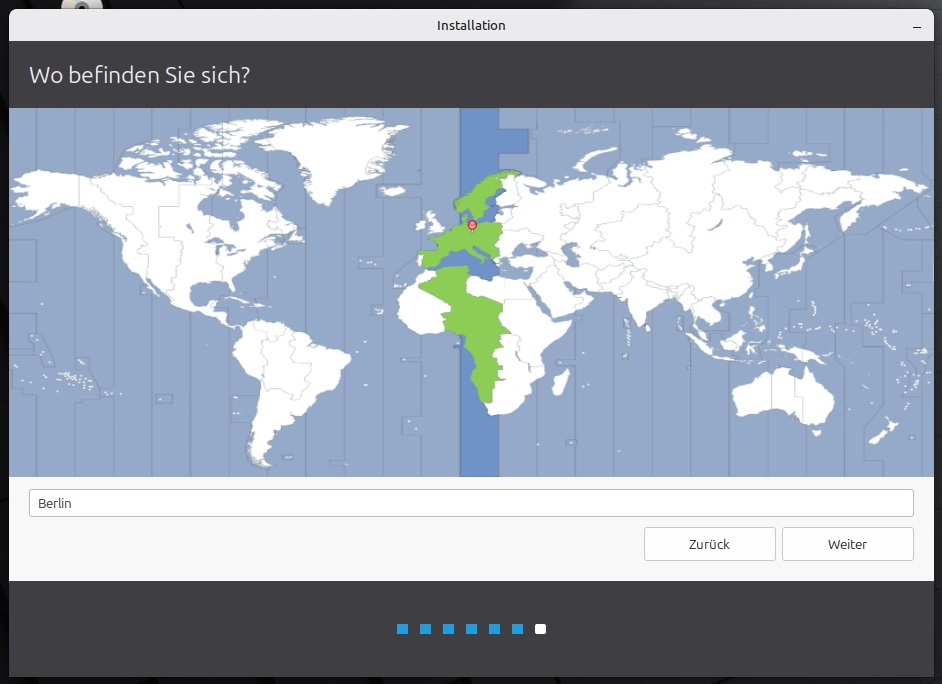
Then, select your current time zone.
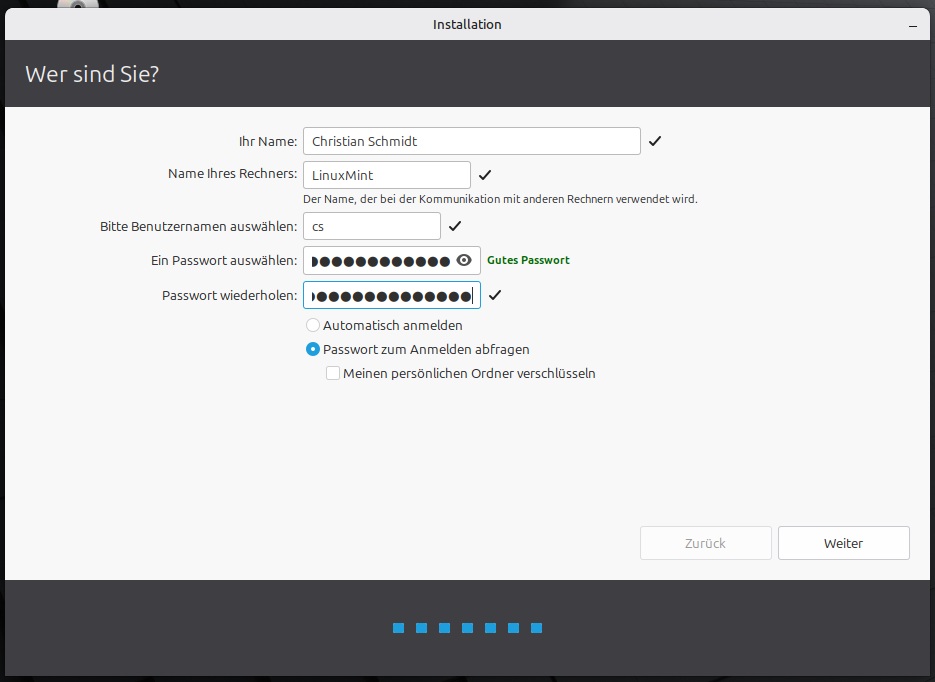
Finally, create a user account and give the computer a name. The installation wizard will also indicate whether it considers your chosen password secure—trust its judgment!
The installation begins next. Once everything is set up, the system will restart, and you will be prompted to disconnect the USB drive from the computer. From now on, whenever you restart, you can choose whether to boot into Windows or Linux Mint. One final note: When you tell Windows to shut down the PC, it doesn't actually shut down completely. It uses a sleep mode to simulate a faster startup, which prevents the boot menu from appearing when you turn the PC on. The boot menu only activates if you select Restart from the Windows Start menu. While this behavior can be changed, I assume that from now on you will mostly be booting into Linux Mint, which does not operate this way.
As always, you can join the discussion and get your questions answered in the Fediverse.